
How to Recover Deleted iPhone Photos from iTunes Backup File
Loss of iPhone Photos
Your daily life become more and more convenient and colorful with the widely use of mobile phone. Take iPhone as an example. You can use it to take photos, make notes, prepare your reminders, and more. Yes, these APPs make your life much better. But at the same time, you also bear the risk of data loss. Suppose that some of your important iPhone photos are missing or deleted by mistake, you may be crazy then. Take it easy, if you have made an iTunes backup before the loss of iPhone photo, you still have the chance to find them back. But, how to recover deleted iPhone photos from iTunes backup file?
The Apple officially recommended method is to restore the iPhone to factory settings and then restore all iTunes backup file to your device. The disadvantage of this method is that you have to erase all existed iPhone data which may cause another kind of data loss. However, if you have a piece of iOS data recovery software, you will be able to restore iPhone photos separately. It is recommended to use the professional MiniTool Mobile Recovery for iOS.
You are also able to get some useful information from this post: 2 Simple Solutions to Recovering Deleted Photos on iPhone.
How to Recover Deleted iPhone Photos from iTunes Backup File
Designed by MiniTool Solution Ltd, this software is specially used to recover data, including notes, bookmarks, messages, photos, and more, from iOS devices such as iPhone, iPad, and iPod touch. In addition, it has Windows version for Windows users and Mac version for Mac users. You can choose a proper version for your use. (Download Win version & Download Mac version)
Suppose that your deleted important iPhone photos are stored in your previous iTunes backup, you are able to restore them by using this way.
At first, you should make sure that the iTunes backup file you are going to restore is stored on the computer you want to use.
Step 1. Open the software and enter its main interface. Then select “Recover from iTunes Backup File” from the top recovery modules bar, and the iTunes backup files stored on the computer will be shown on this interface automatically. Choose the iTunes backup file you want to use and click on “Scan” to start the scanning process.
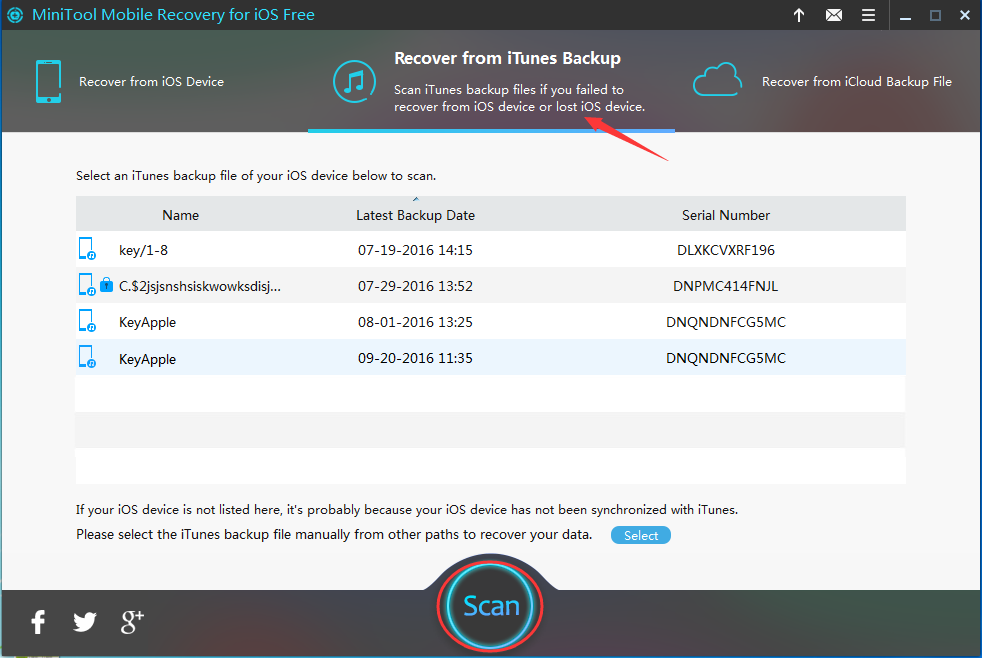
Tip:
If the iTunes backup file you want to use is not listed here on the interface, you can make it displayed manually by clicking on the lower side blue icon “Select”, then choosing the available iTunes backup file from the stored path and pressing “Add” finally.
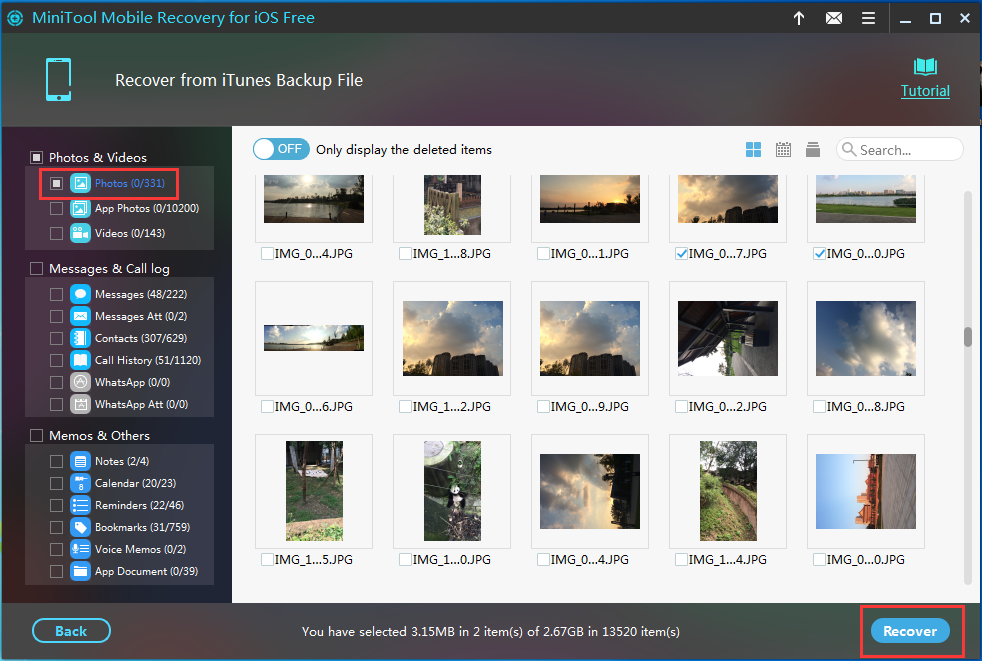
Step 2. When the scanning process is completed, you will enter the results interface. On this interface, all the scanned data and files are listed in category. Click on “Photos” from the left side of the interface, and all the scanned photos will be displayed on the right side with their name. Choose the ones you want to recover and click on “Recover” to continue.
Step 3. Click on “Browse” on the first pop-out window, select a proper path or create a new folder on the second pop-out window and then click on “Recovery” to save the target iPhone photos on the specified path.
With these three simple steps, all your wanted iPhone photos will be kept on your computer then. And you are allowed to use them directly.
See! This iOS data recovery tool is so useful. Next time, if you are facing the relative issues, you can use this tool to help you.
- Don't saving photo recovery software or recover photos to partition suffering photo loss.
- If free edition fails your photo recovery demand, advanced licenses are available.
- Free DownloadBuy Now

